
Knowledge base › Survey guide
Survey guide
How do I record the CEE-LINE™ echogram in HYPACK®?
Use the USB-A dual COM cable: CEE-LINE Connect 3 on the first COM port, and the HYPACK® CEE Hydro CEE-LINE driver on the second with Record device specific messages ticked. HYPACK® doesn’t use the output format or baud rate, so any format can be left set. Max Depth in Connect 3 sets the HYPACK® display and record range.
CEE Hydro CEE-LINEHYPACK® driver
2 COM portsUSB-A dual COM cable
Any formatoutput format not used by HYPACK®
20 Hzwater column echogram
The short answer
Connect the CEE-LINE™ HD with the USB-A dual COM cable. It gives you two COM ports: use the first for CEE-LINE Connect 3 and the second for HYPACK®. In HYPACK®, add the CEE Hydro CEE-LINE driver on the second port and tick Record device specific messages. That records the full 20 Hz water column echogram with the depths.
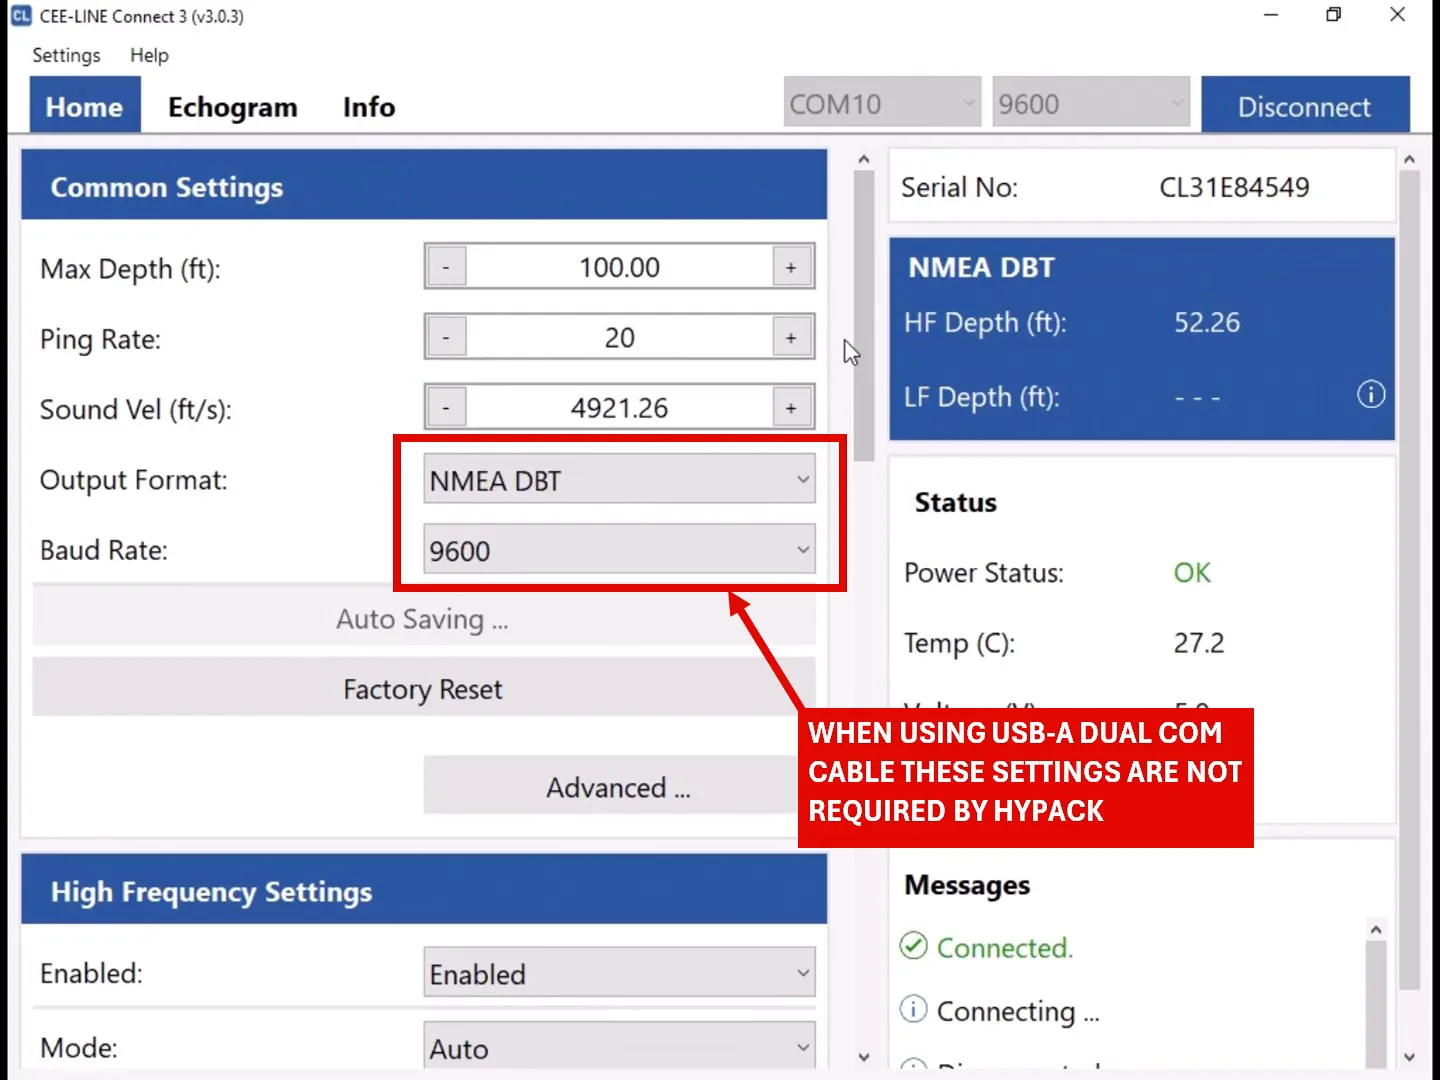
With this cable you don’t need to pick an output format for HYPACK®. The driver reads the echogram and depths directly, so the Output Format and Baud Rate in CEE-LINE Connect 3 (for example NMEA DBT at 9600) can be left as they are.
You need CEE-LINE Connect 3 to set up the echo sounder. Keep it open while HYPACK® is running, so you can change settings during the survey.
Step 1: Connect the CEE-LINE™ HD and open CEE-LINE Connect 3
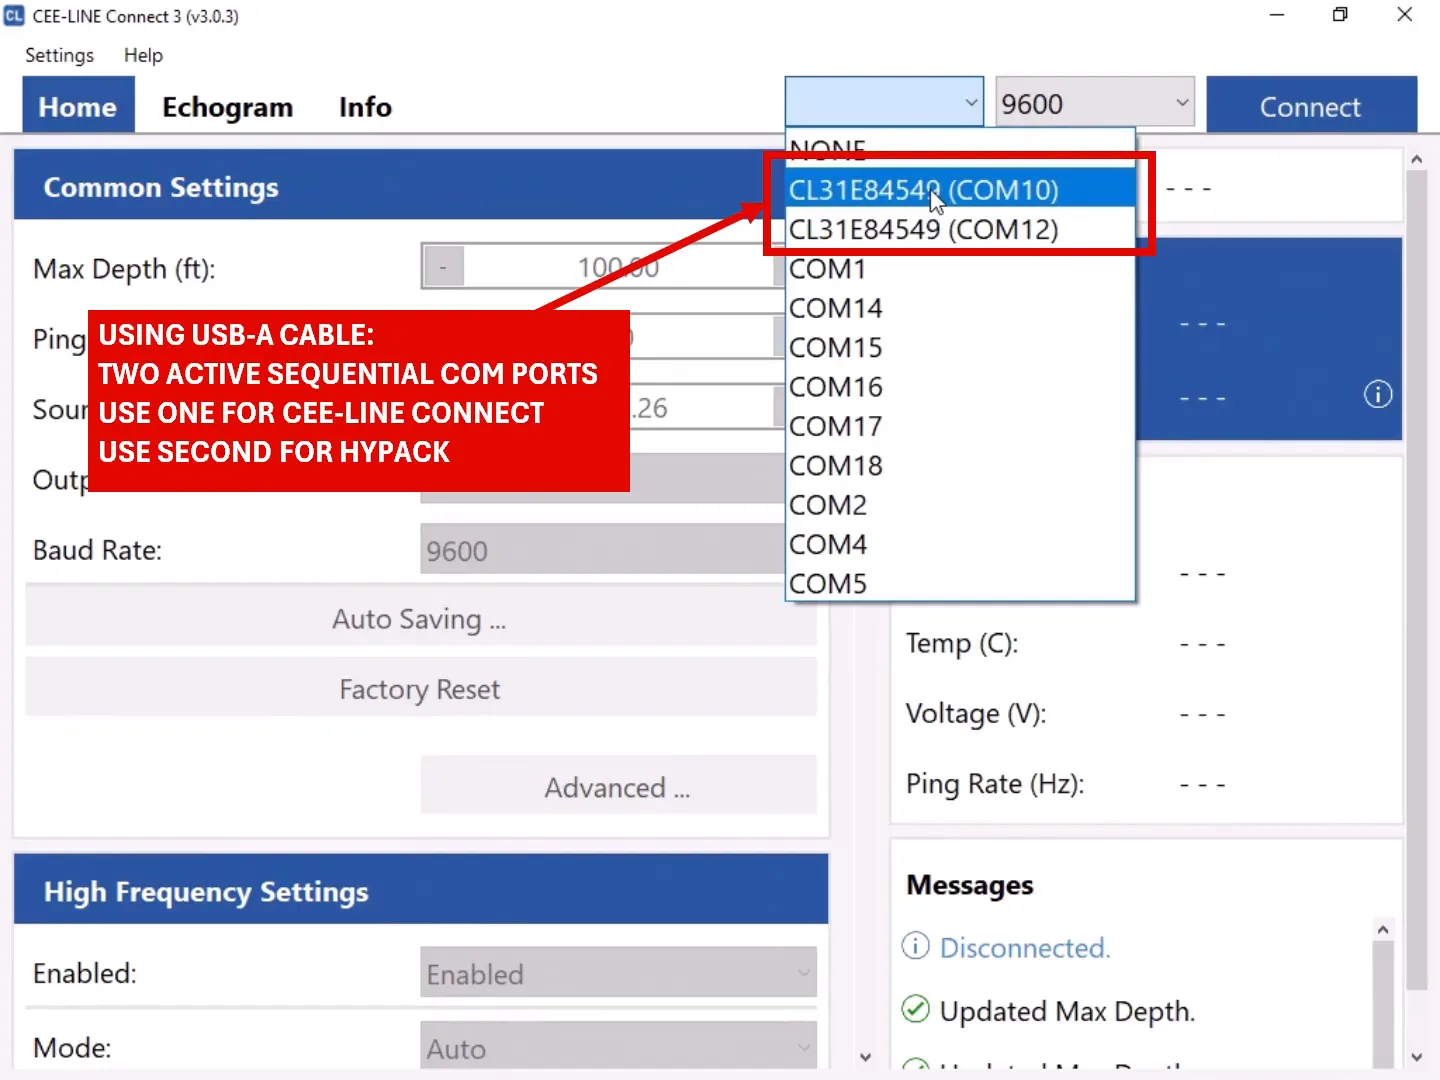
Plug the USB-A dual COM cable into the PC. Two sequential COM ports appear, both named with the CEE-LINE™ serial number (in the example below, COM10 and COM12). In CEE-LINE Connect 3, select the first port and click Connect. Leave the second port free for HYPACK®.
Step 2: Check the echo sounder settings
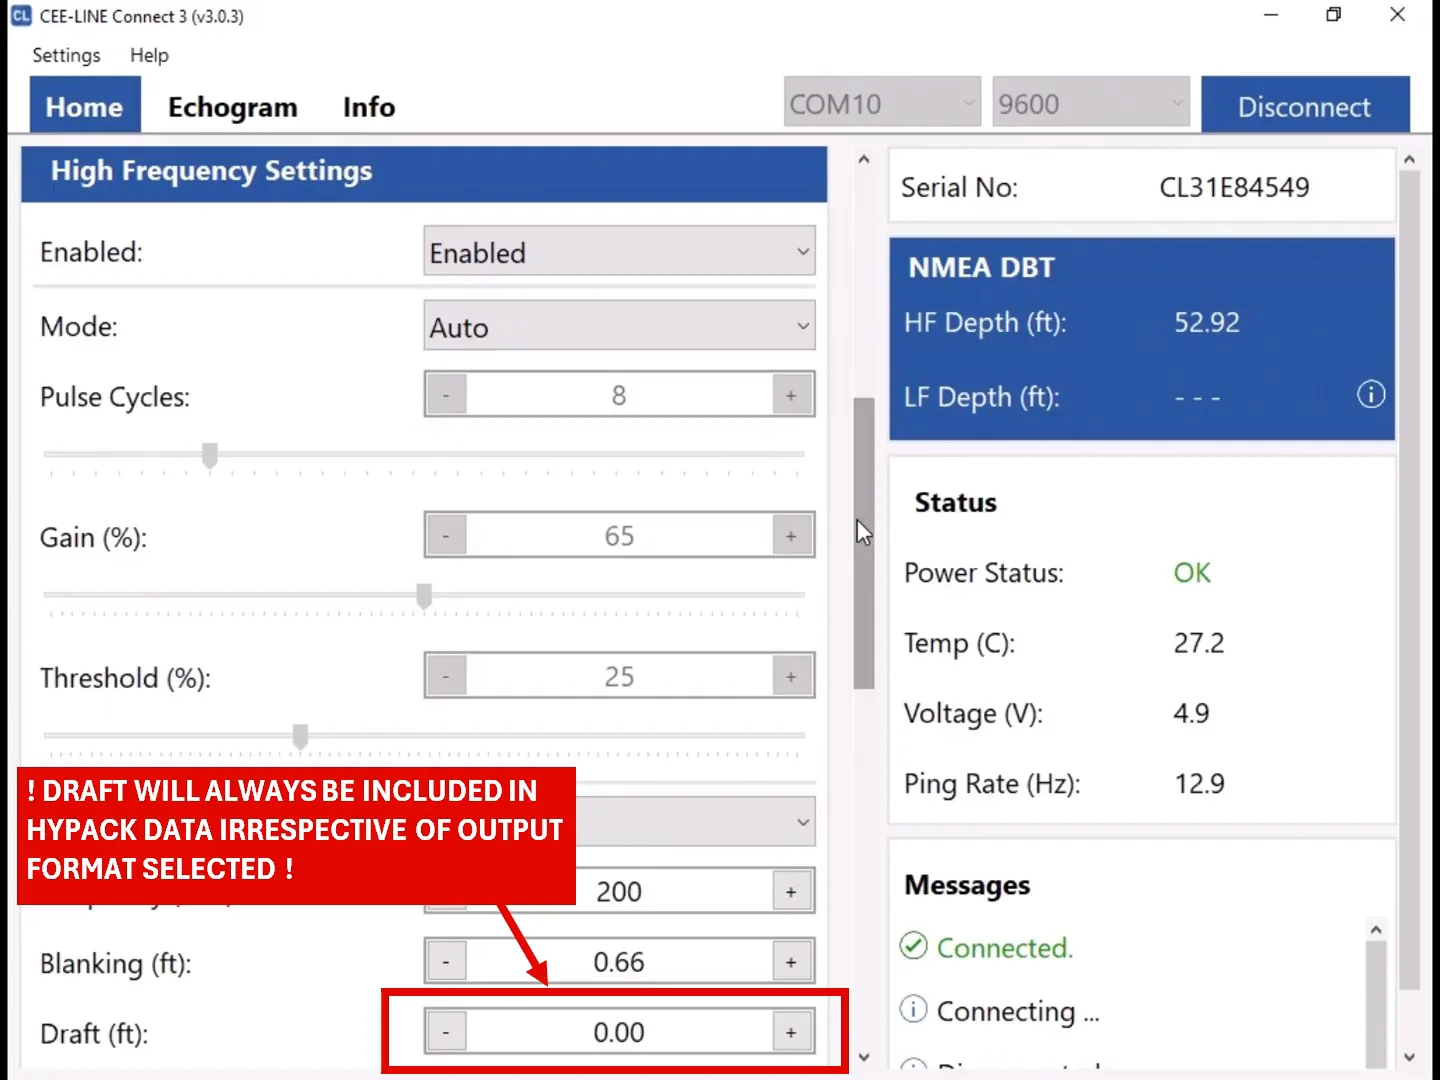
Draft
Any draft entered in CEE-LINE Connect 3 is always included in the HYPACK® data, whatever output format is selected. If you enter the draft in HYPACK® instead, leave it at zero here, and don’t enter it in both places.
Low frequency
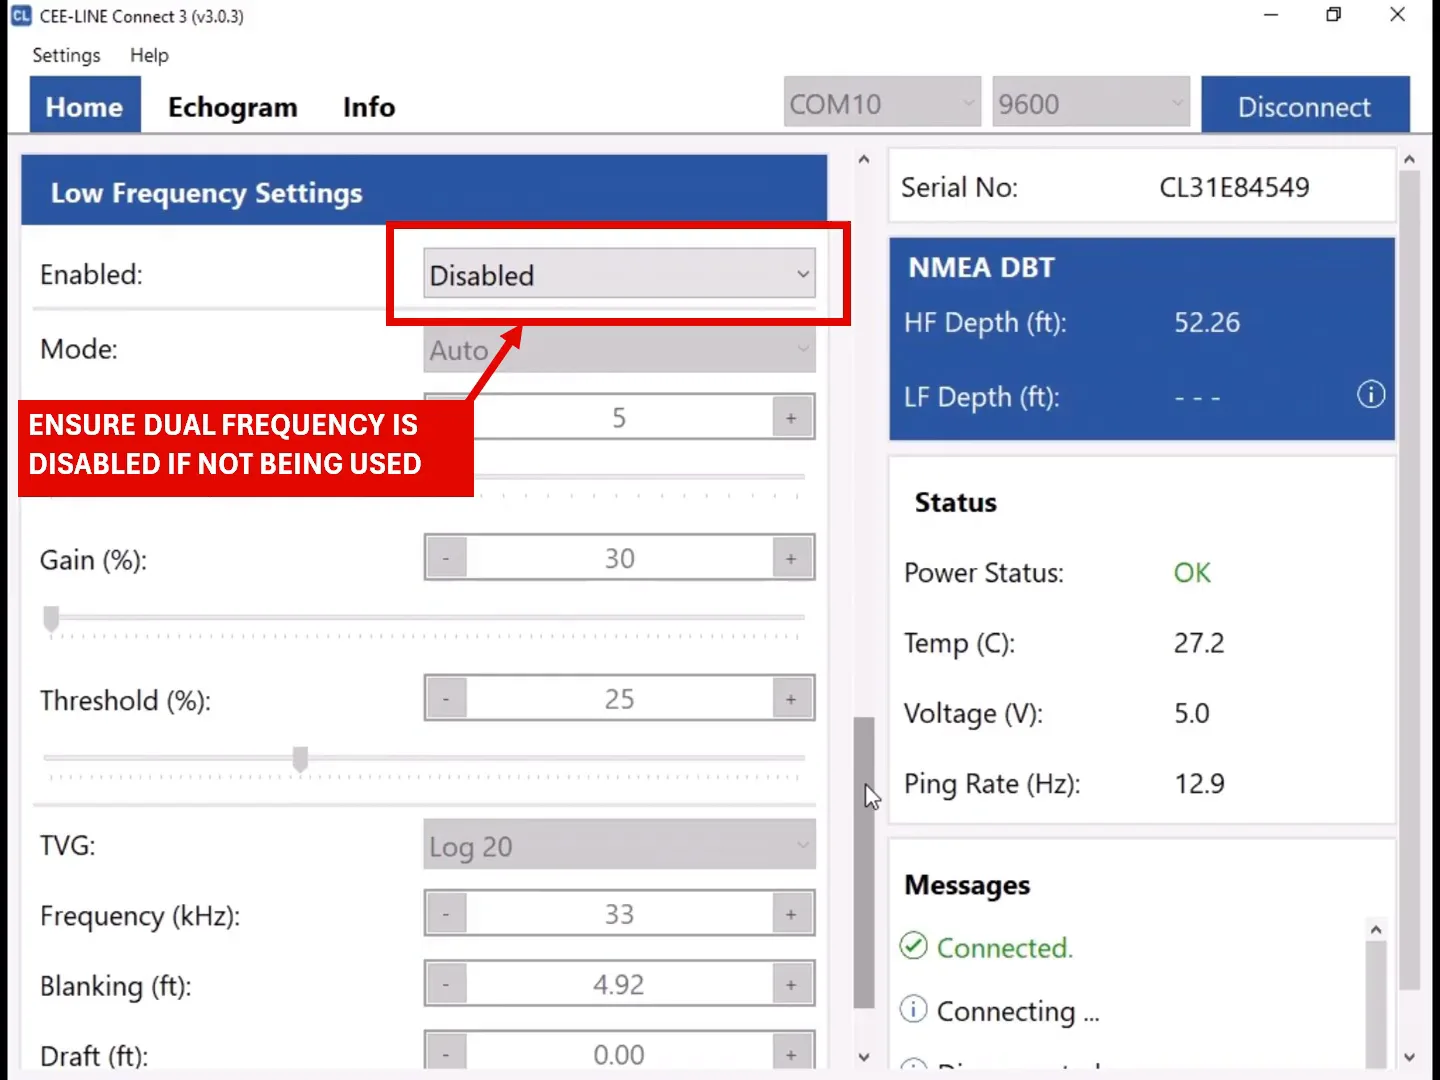
If you aren’t using dual frequency, set the Low Frequency channel to Disabled.
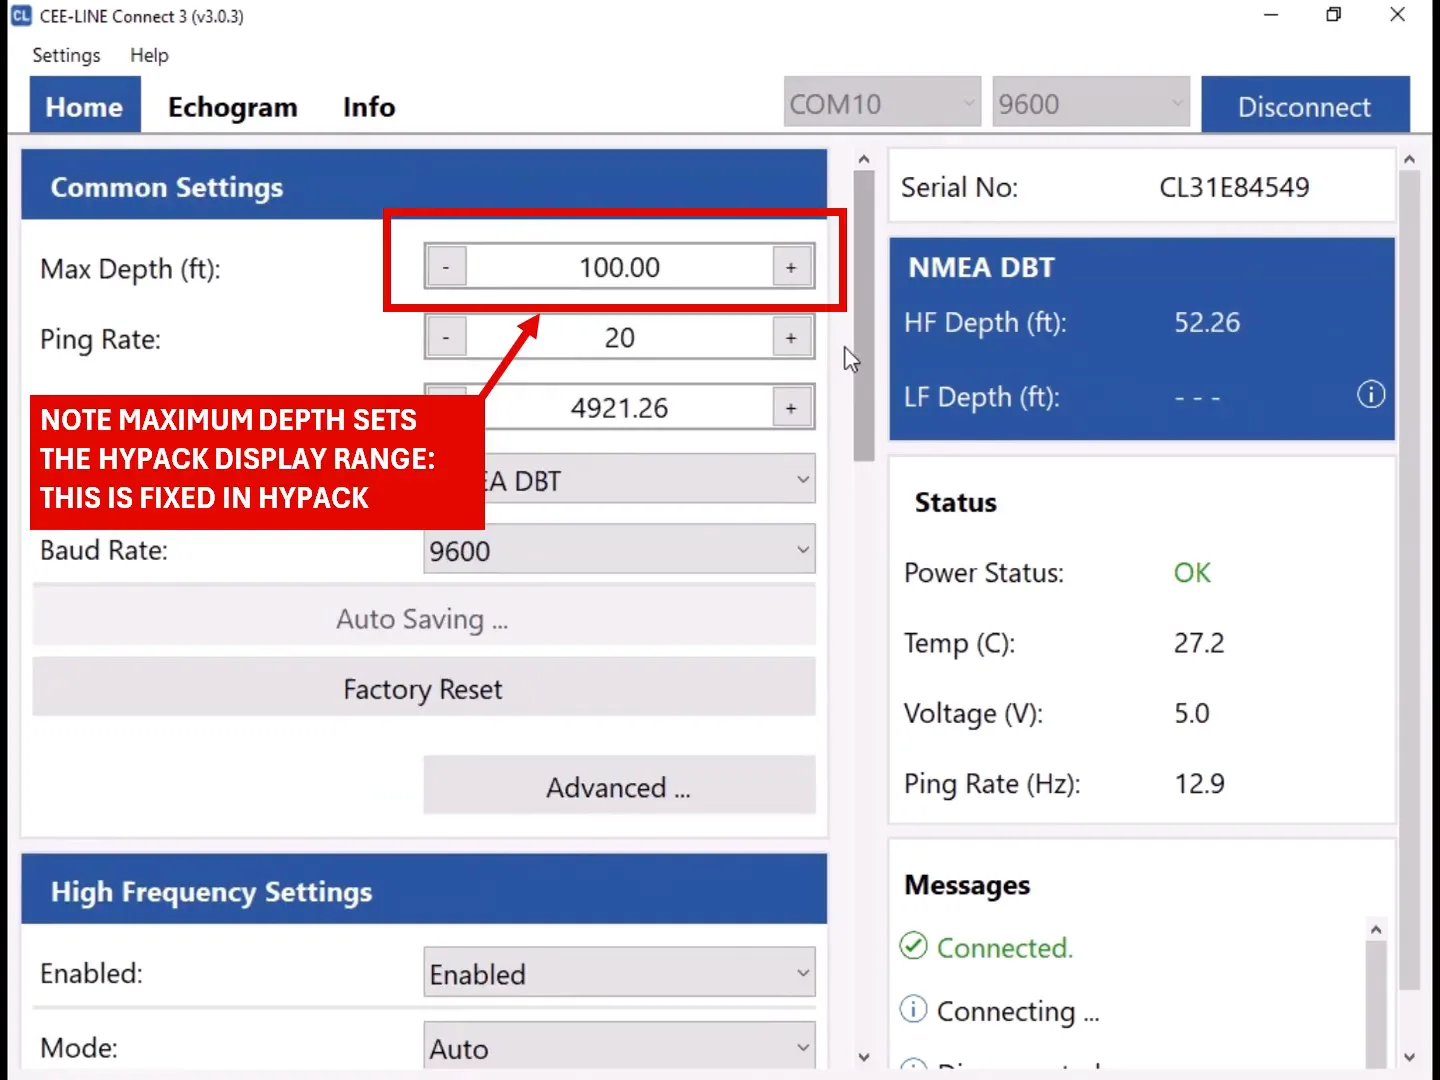
Maximum depth
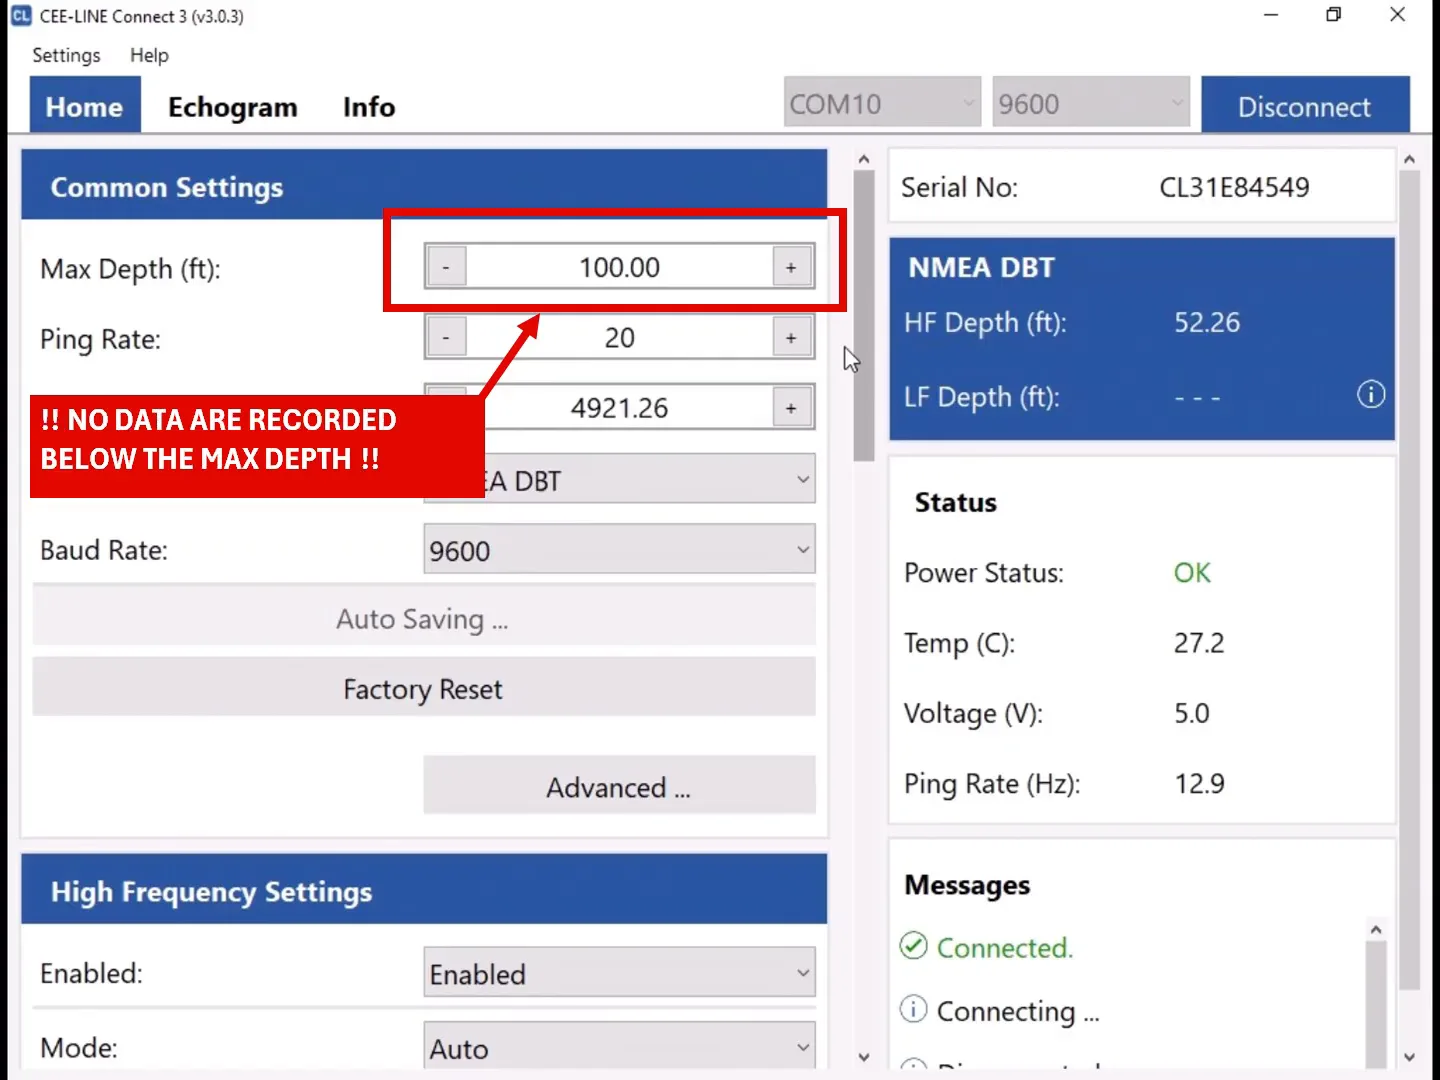
Max Depth sets the display and recording range of the echogram in HYPACK®. You can’t change this range in HYPACK®; change Max Depth in CEE-LINE Connect 3 instead. No data are recorded below the maximum depth. Set it a little deeper than the deepest water you expect on the job.
Output format and baud rate
With the USB-A dual COM cable, HYPACK® doesn’t use these two settings, so leave them as they are.
Step 3: Set up the HYPACK® hardware
In HYPACK® Hardware, add two devices to the boat:
| Data | HYPACK® driver | Settings |
|---|---|---|
| Depth and echogram | CEE Hydro CEE-LINE (CEELINE.dll) | Functions: Depth and Record device specific messages. Connection: Serial, on the second CEE-LINE™ COM port. |
| Position | GPS NMEA-0183 (the standard GNSS driver) | As for your GNSS receiver. |
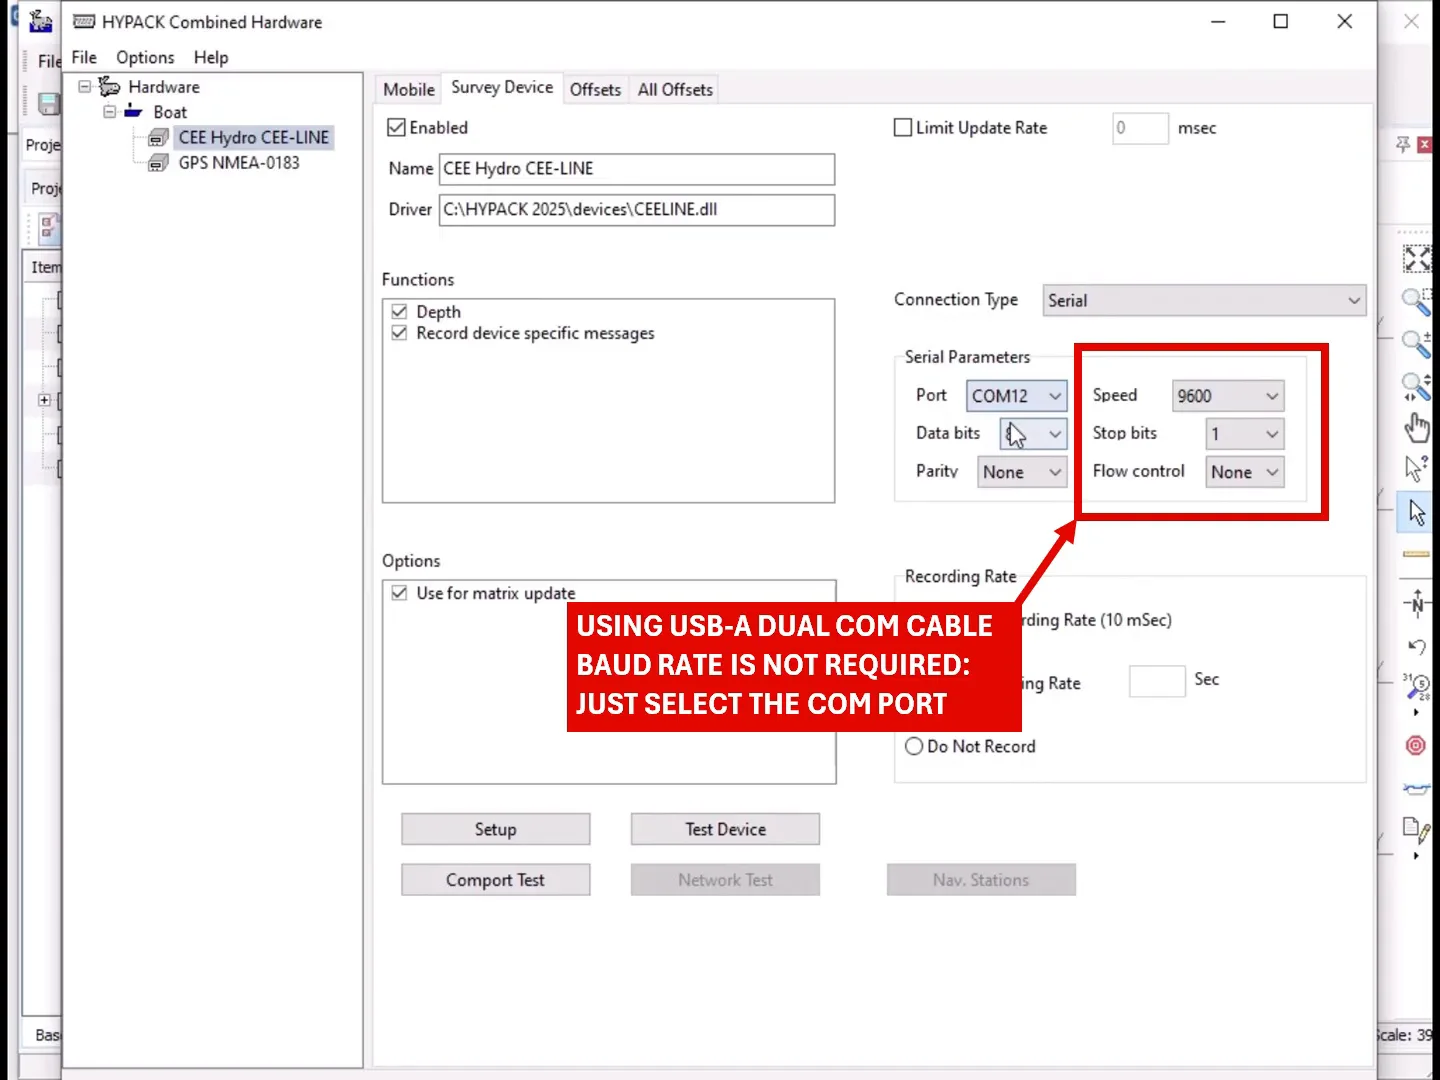
Select the COM port
Choose the second CEE-LINE™ COM port (COM12 in the example). With the USB-A dual COM cable the baud rate isn’t used, so you only need to select the port.
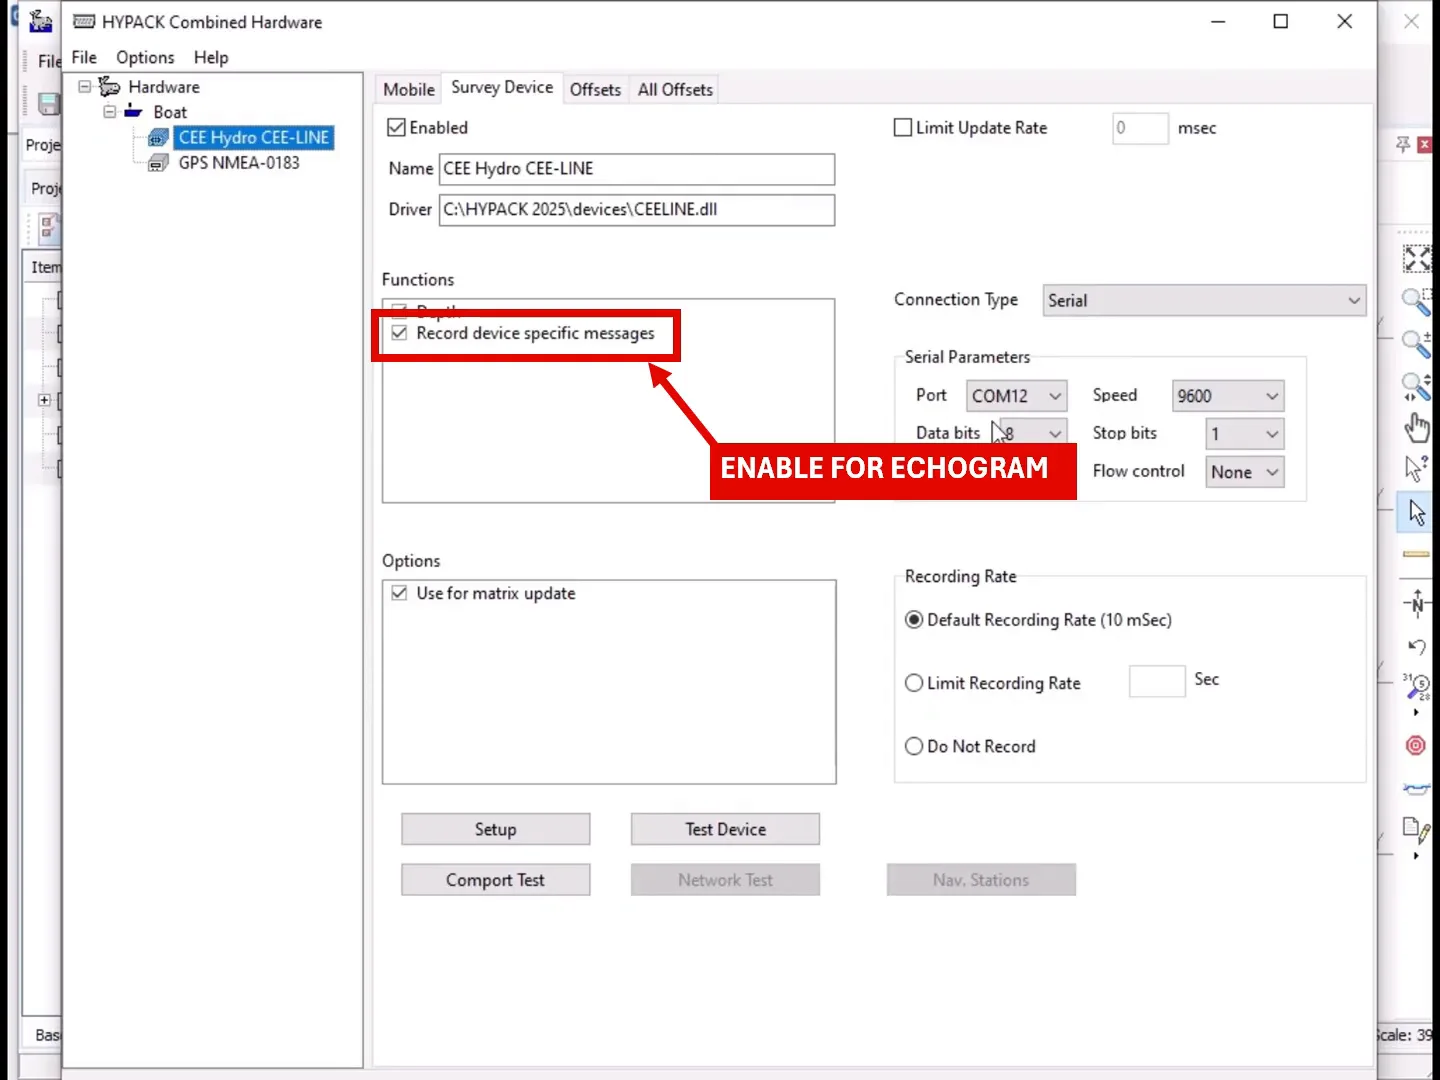
Record the echogram
Tick Record device specific messages. Without it, HYPACK® records the depths but not the echogram.
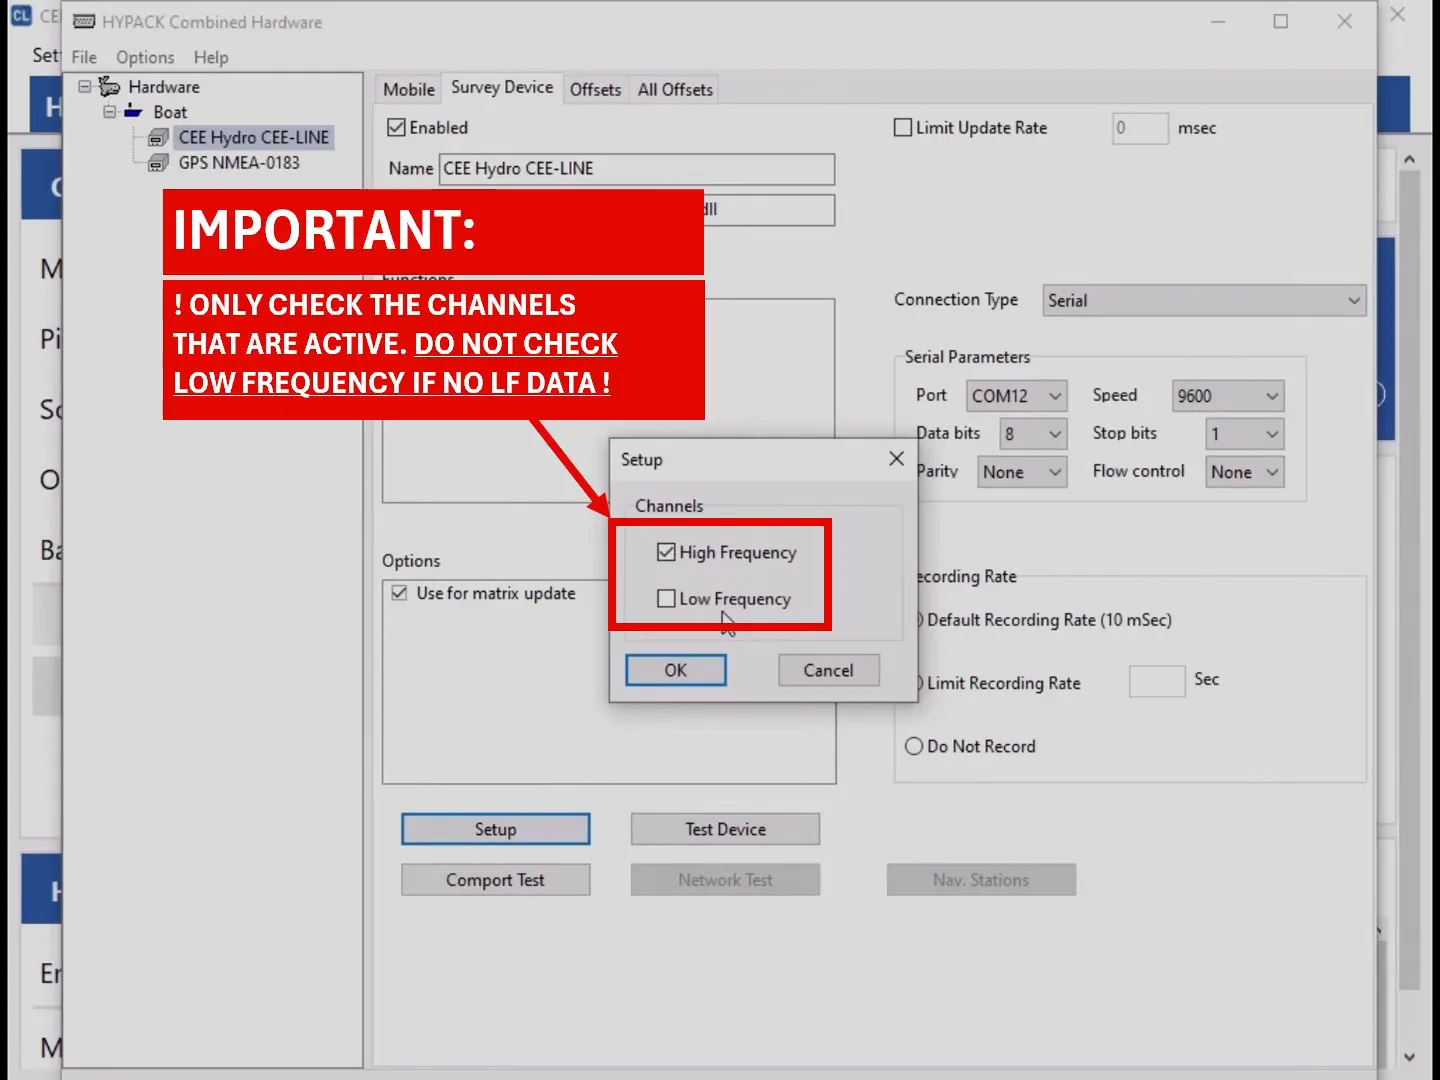
Channels
Click Setup and tick only the channels that are active on the CEE-LINE™.
Don’t tick Low Frequency if there’s no LF data. Only check the channels that are enabled in CEE-LINE Connect 3.
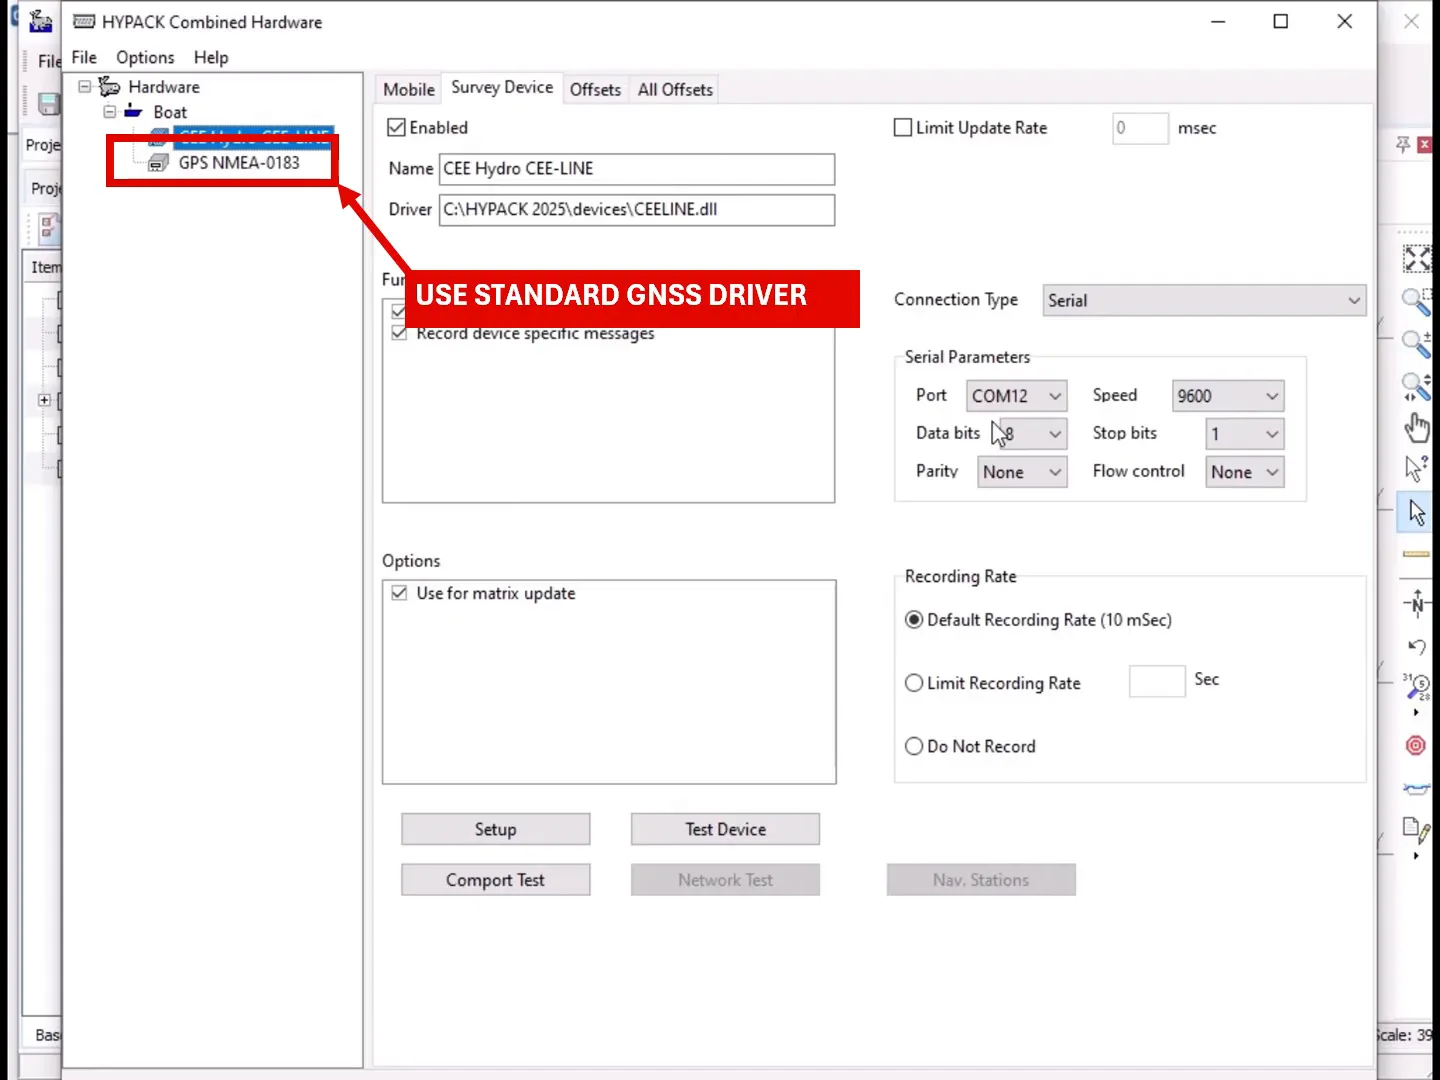
Position
Use the standard GPS NMEA-0183 driver for your GNSS receiver.
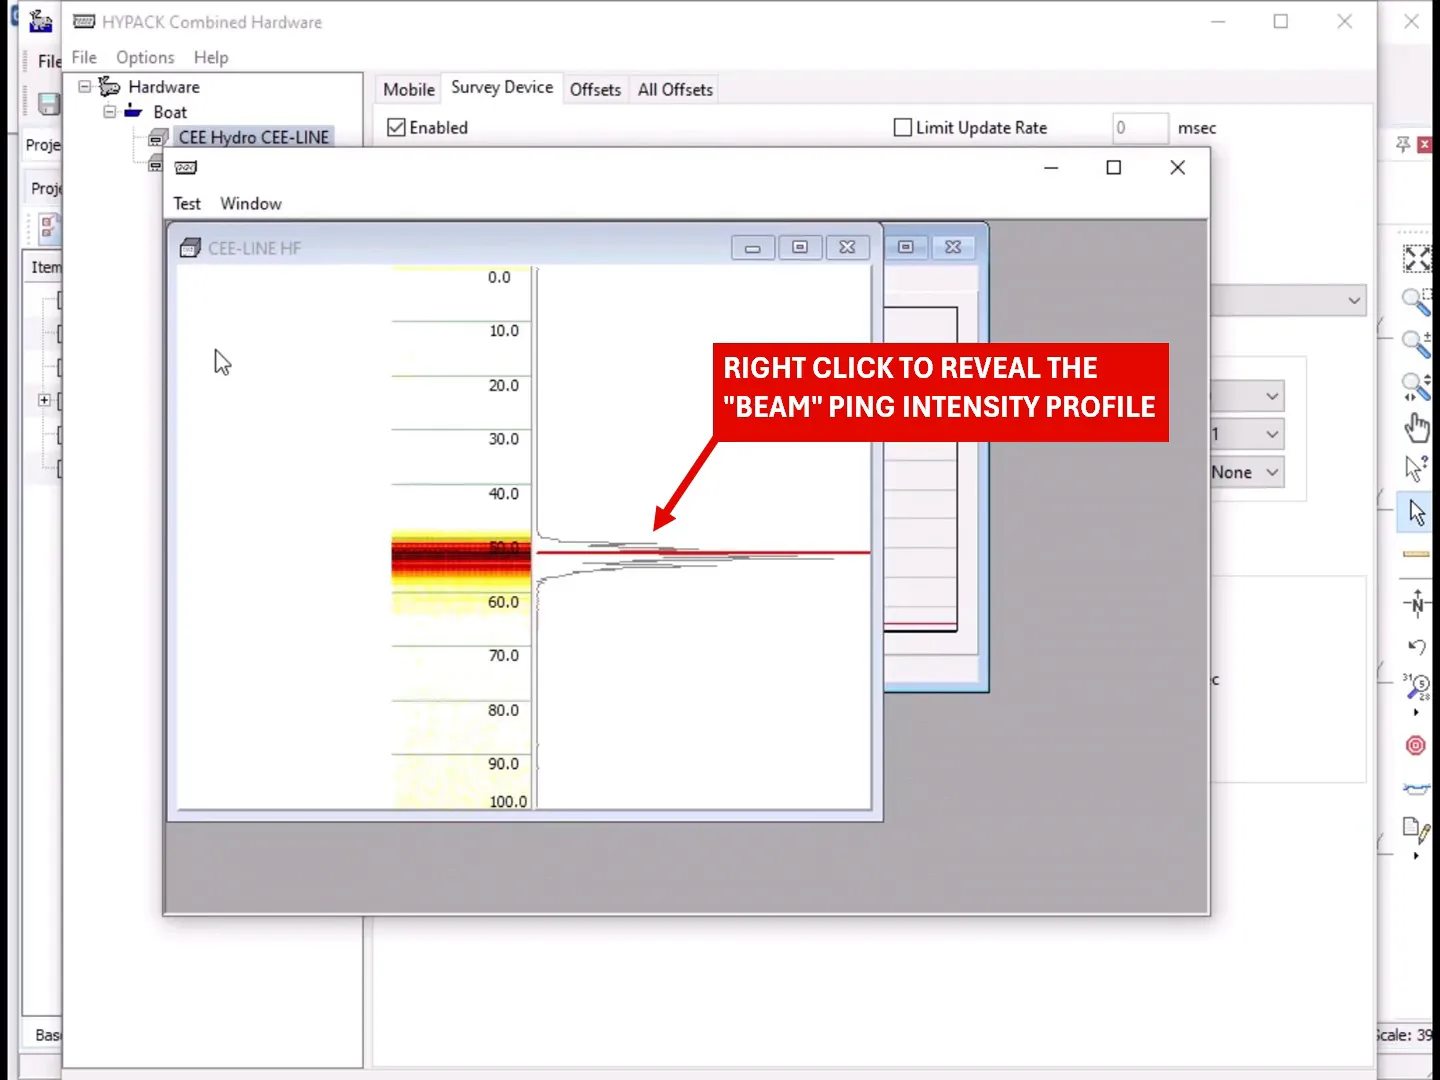
Step 4: Test before you survey
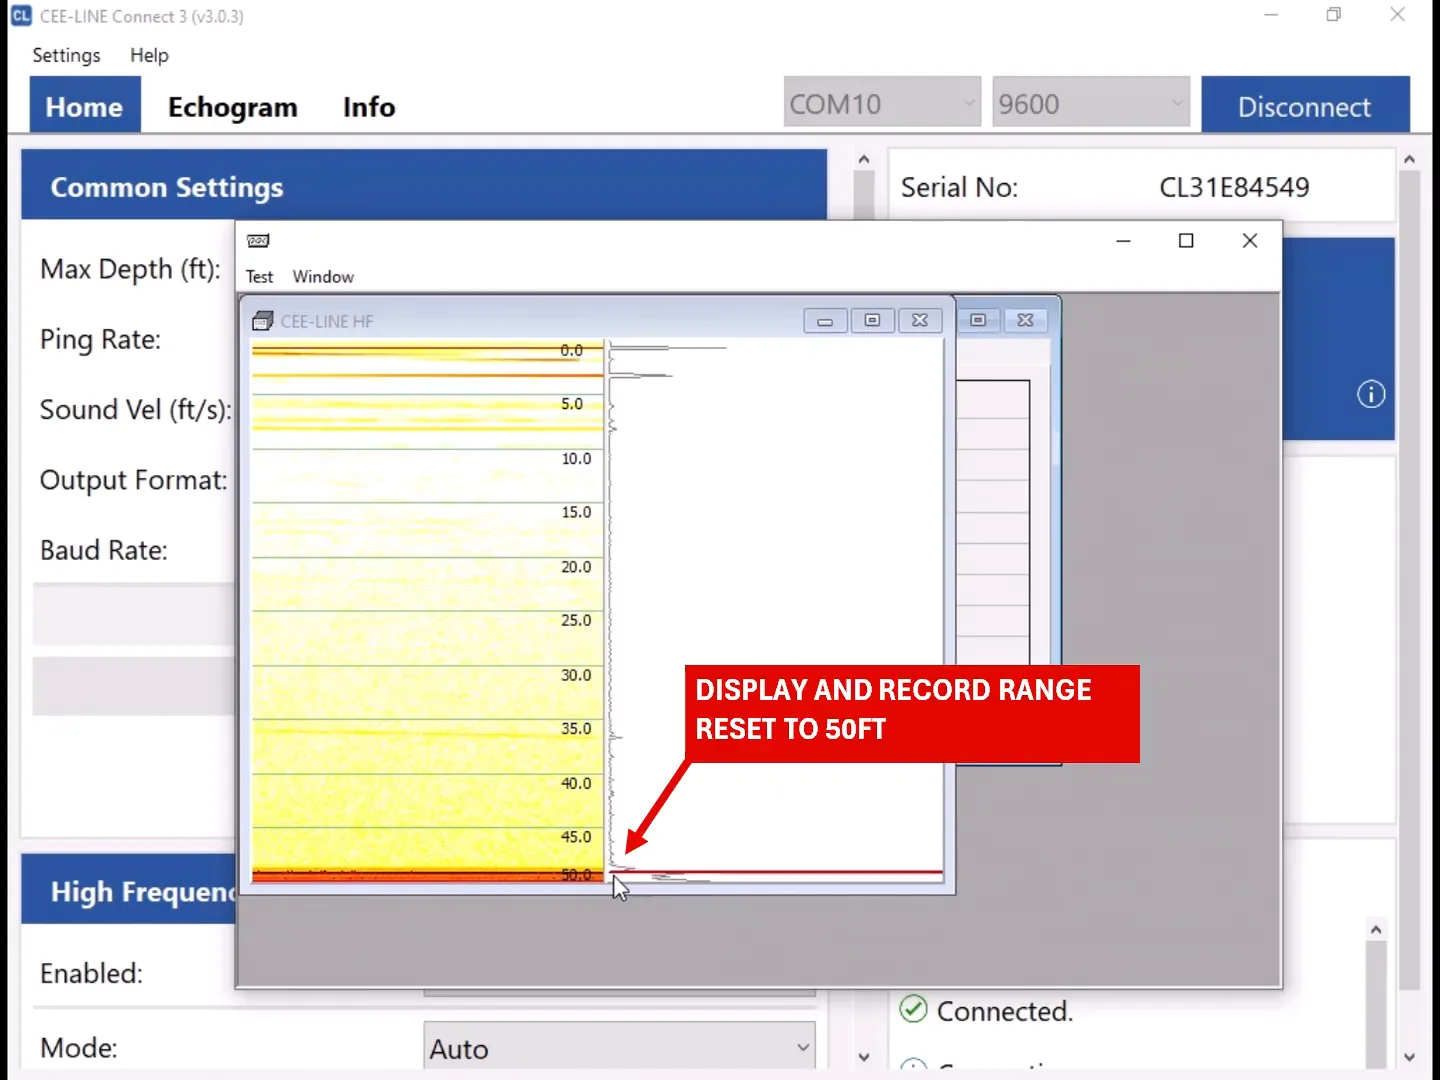
Click Test Device on the CEE Hydro CEE-LINE driver. You should see live depths and the echogram window (CEE-LINE HF). Right-click the echogram to show the “beam” ping intensity profile.
To change the range, change Max Depth in CEE-LINE Connect 3. In the example it was reduced from 100 ft to 50 ft, and the HYPACK® display and record range reset to 50 ft.
Finish with a bar check to confirm the set-up before you start surveying.
More about the echogram
Equipment used
Talk to US
Need a hand with your set-up?
Our engineers answer survey questions every day.