

Knowledge base › Survey guide
Survey guide
How do I log, copy and erase survey data on the CEESCOPE™ or CEE ECHO™?
Insert a USB stick before pressing RECORD, and the unit logs to its 128 GB internal drive and the stick at the same time. Files are named prefix + date + time. Copy or erase everything, one prefix or chosen files from the FILE menu. Erased data can’t be recovered, so check your copy on a PC first.
128 GB internal drive on current units
Internal + USB logged at the same time
8 characters for the file name prefix
Permanent erased data can’t be recovered
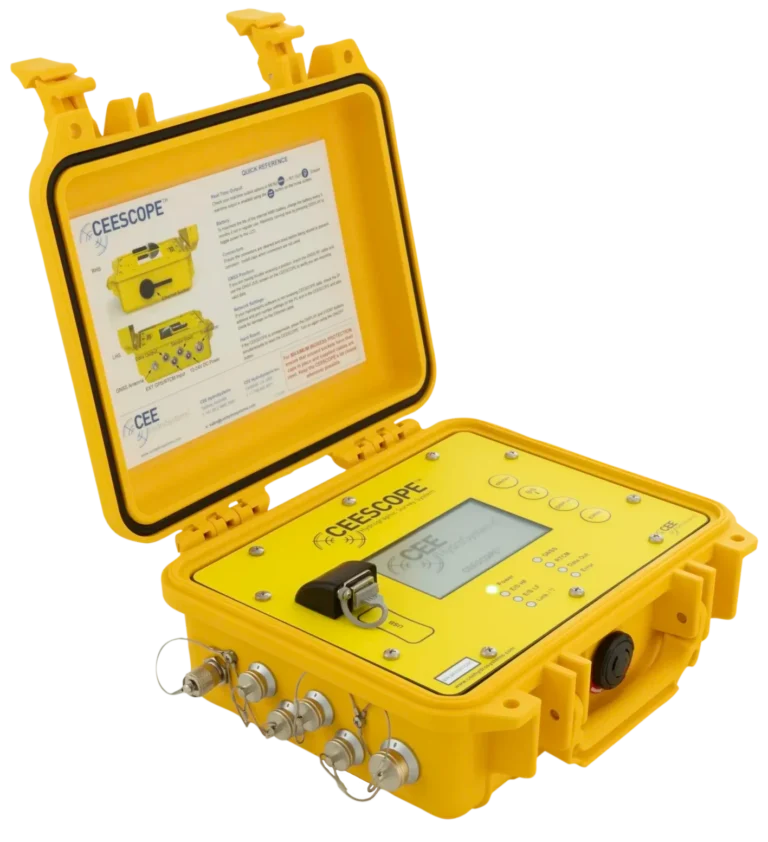
The CEESCOPE™, CEESCOPE LITE™ and CEE ECHO™ log the survey inside the unit, and to a USB memory stick at the same time, so you leave the boat with a full copy. Logging is separate from the real-time output. Log in the unit even when your survey software is logging on a PC: it’s your backup if the PC’s data is lost.
Everything here is on the touchscreen: the record buttons on the main screen, and the FILE menu for file names, events, copying and erasing.
What gets logged?
Each time you start logging, the unit creates a new file named with your prefix, the date and the time.
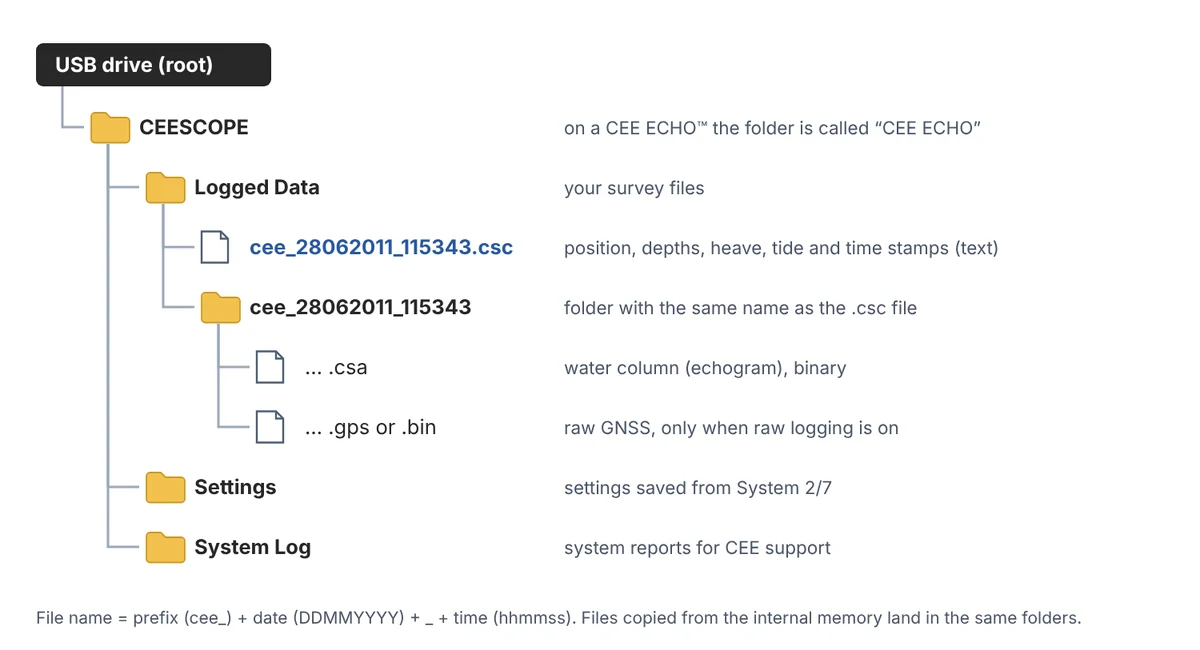
- .csc: a text file with the position and other GNSS values, the digital depths, and heave and tide if they’re enabled, all time-stamped.
- .csa: the water column (echogram) data, in a folder with the same name as the .csc file.
- .gps or .bin: raw GNSS data for post-processing, in the same folder, only if raw logging is turned on. See how do I post-process CEESCOPE™ raw GNSS data?
To process the data, CEEDATA (a download on the product pages) makes HYPACK® RAW and CSV files from it. See how do I import CEESCOPE™ data into HYPACK or Hydromagic?
How do I log to a USB stick as well?
- Insert the USB stick before you press RECORD. When the unit detects it, the USB button on the main screen turns solid blue. A file only goes to the USB stick if the stick was detected before logging started; otherwise that file is internal only.
- Use a normal USB memory stick, not a portable hard drive.
- Eject it properly. Press the blue USB button and wait for it to turn grey before you pull the stick out. You can also remove it once the unit is turned off.
Don’t pull the USB stick out while it’s blue. Removing it without ejecting can corrupt or lose the data on it.
How do I start, pause and stop logging?
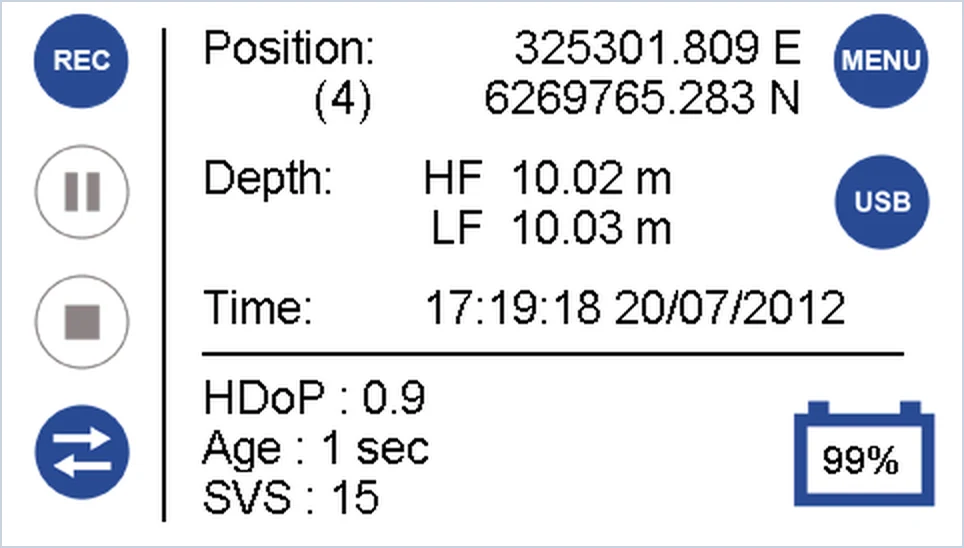
- RECORD starts a new file and turns blue. It only starts when there’s no error on screen, so fix any error first. An error that appears after logging starts stays on screen but doesn’t stop the logging.
- PAUSE pauses logging and turns blue. Press RECORD to carry on in the same file.
- STOP closes the file. The next RECORD starts a new one.
- EVENT, the button on the front panel, marks a numbered event in the file while you’re logging, for points you want to look at later.
While a file is open, the critical settings (draft, sound velocity, GNSS settings and others) are locked. Stop logging to change them: see how do I set draft, index and sound velocity? You can also start and stop logging from a PC with CEESCOPE Connect: see how do I connect a PC over Ethernet?
How are the files named?
Prefix + date + time. With the prefix cee_, a file started on 28 June 2011 at 11:53:43 is cee_28062011_115343.csc. The date is DDMMYYYY by default; you can change it to MMDDYYYY on the Date/Time page in the System menu.
To change the prefix:
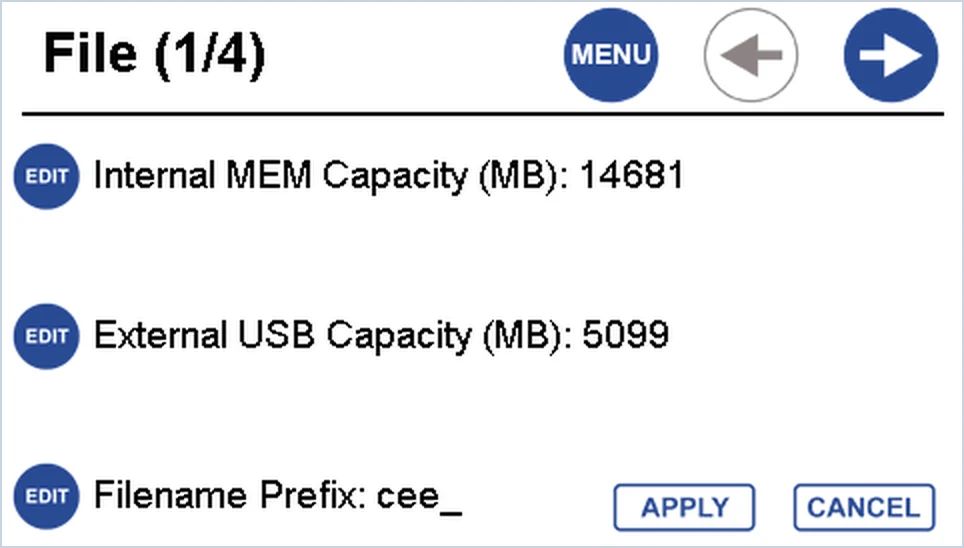
- Press MENU → FILE to open File 1/4.
- Press EDIT next to Filename Prefix, type up to 8 letters, numbers or underscores (_), and press ENTER.
- Press APPLY. The prefix stays until you change it or reset the unit to factory settings.
Tip: a prefix per job or site. It makes the files easy to find later, and lets you copy or erase one job’s files at once with COPY PREFIX and ERASE PREFIX.
How do I set up the event numbers?
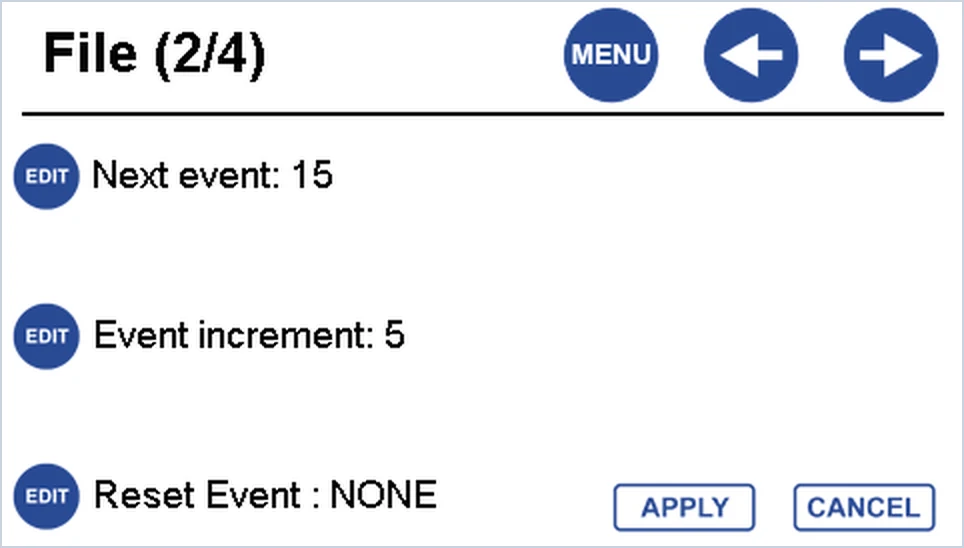
Press MENU → FILE → RIGHT for File 2/4.
- Next event: the number the next event gets. It’s also shown in the scrolling messages on the main screen.
- Event increment: how much the number goes up each time.
- Reset Event: set to RESET and press APPLY to start again from 1.
The numbers carry on across files: they don’t restart when a new file opens.
How do I copy data to the USB stick?
Everything, or one prefix: on File 1/4, press EDIT next to Internal MEM Capacity and choose COPY ALL FILES TO USB, or COPY PREFIX for only the files with the prefix shown on File 1/4.
Chosen files:
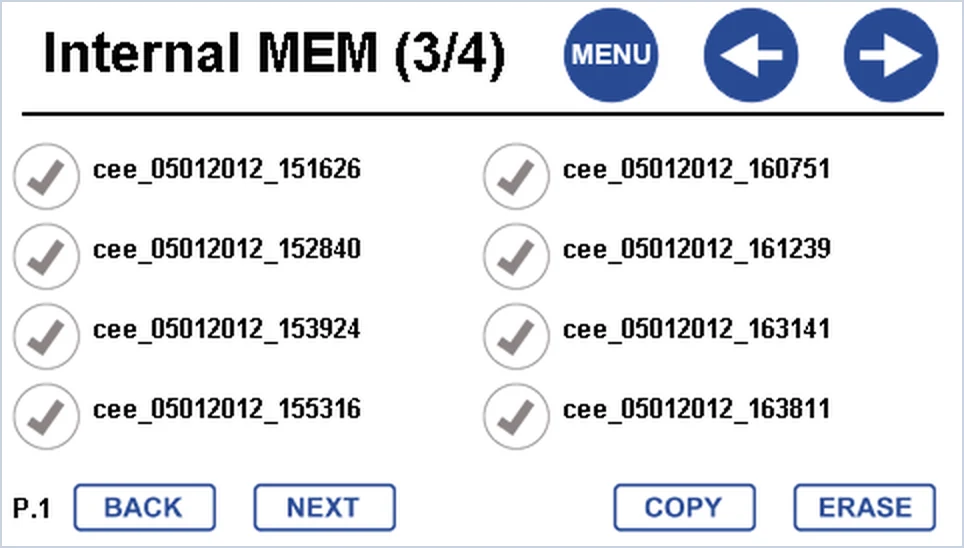
- Press RIGHT to File 3/4, Internal MEM. It lists the files, eight to a page. Use NEXT and BACK to move between pages; the list can take up to 5 seconds to appear.
- Tap the tick next to each file you want. Each tick turns blue.
- Press COPY.
COPY and ERASE only act on the page you’re looking at. Ticks on other pages are ignored, so repeat it for each page. To copy or erase everything, use File 1/4 instead.
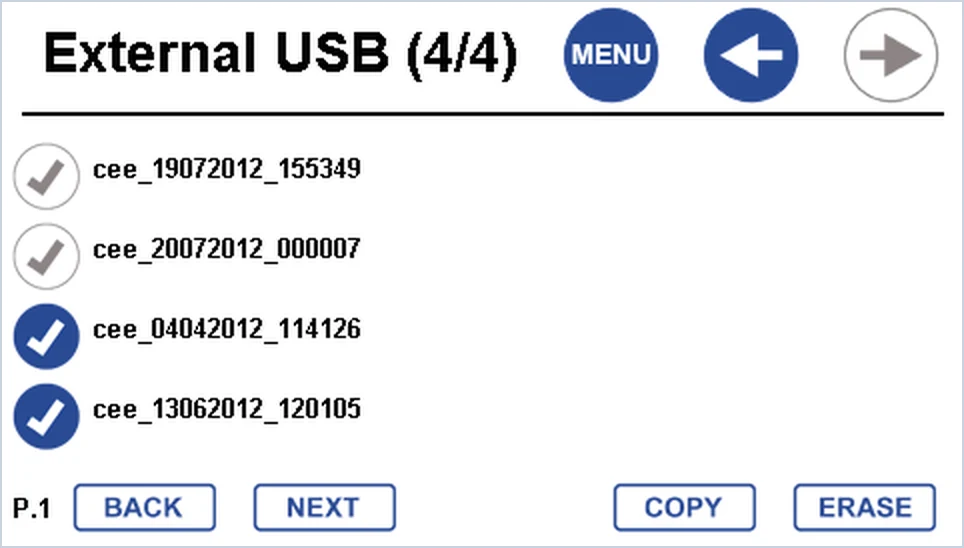
It works the other way too. File 4/4, External USB, copies ticked files from the USB stick to the internal memory, and External USB Capacity on File 1/4 has COPY ALL FILES TO Internal Memory.
On the PC, copy the whole CEESCOPE (or CEE ECHO) folder from the USB stick, so each .csc file keeps its folder of water column data.
How do I erase data?
Erased data can’t be recovered. Check the files are safely on a PC before you erase anything from the unit.
- Everything, or one prefix: on File 1/4, press EDIT next to Internal MEM Capacity and choose ERASE ALL or ERASE PREFIX. Use External USB Capacity to do the same on the USB stick.
- Chosen files: tick them on File 3/4 (internal) or File 4/4 (USB) and press ERASE.
What if the memory fills up or logging fails?
- Check the free space on File 1/4. It shows what’s left on each drive, not its total size.
- USB stick full, but there’s not much on it? Files deleted on a computer may still be in the stick’s trash or recycle bin. Empty it on the computer.
- Logging or file errors: try the memory check-up or USB check-up on System 3/7 before formatting. Each can take up to 90 minutes, so connect external power.
- Formatting (Format on System 1/7: Internal Memory or External Memory) erases every file on that drive. Formatting the internal drive can take up to 4 hours. Use external power, and copy your data off first.
A factory reset doesn’t erase logged data: only formatting or erasing does.
Related guides
Equipment used
Single Beam Echo Sounder with Built-in GNSS
CEESCOPE LITE™
The whole CEESCOPE, in an even smaller footprint
View product
Talk to US
Need a hand with your set-up?
Our engineers answer survey questions every day.